


Views: 0 Author: Site Editor Publish Time: 2026-07-24 Origin: Site


Exhaust leaks present immediate drivability issues—ranging from cabin exhaust fumes and failed emissions tests to degraded engine performance and excessive noise. While full component replacement or professional TIG/MIG welding is the definitive fix, these options are often cost-prohibitive or physically impossible for aging exhaust systems with widespread surface corrosion. DIY repairs frequently fail because users misunderstand the physical limitations of chemical sealants under extreme thermal cycling and vibration.
A successful repair relies entirely on matching the correct chemical compound to the specific type of leak (slip-fit joint vs. structural crack) and executing strict surface preparation. This guide breaks down how to evaluate, select, and apply an exhaust system sealer for a durable, verifiable repair.
Preparation Dictates Longevity: Over 80% of exhaust system sealer failures are caused by inadequate surface preparation. Bare metal contact, free of carbon deposits and iron oxide (rust), is a non-negotiable requirement.
Match the Compound to the Defect: High-temperature metallic pastes excel at sealing slip-fit joints and minor flange gaps, while fiberglass-reinforced bandages, exhaust ribbons, or putties are required for bridging physical holes in straight pipe sections.
Thermal Curing is Mandatory: Most high-grade exhaust sealants require a specific heat-cycling process (idling the engine to reach operating temperature) to cross-link the polymers and achieve their rated structural hardness.
Understand the Limitations: No exhaust system sealer is a structural replacement for metal. Sealants cannot bear mechanical loads or hold together severed pipes without the addition of physical hardware (clamps or sleeves).
Before opening a tube of chemical paste, you must define what constitutes a viable candidate for chemical sealing versus a mandatory mechanical replacement. Not all exhaust leaks can be fixed with a sealant. You need to get under the chassis, inspect the piping, and understand the structural integrity of the metal you are working with.
The specific type of defect dictates your repair method. Exhaust systems endure extreme environments, and the damage they sustain varies by location and component design. You must categorize the leak accurately before proceeding.
Slip-fit joints and flanges often leak due to loose clamps, degraded gaskets, or minor pipe distortion from previous overtightening. These areas have high viability for paste sealers because the underlying metal structure remains intact. The sealer simply acts as a gap-filler between two solid pieces of steel.
Muffler seams and welds frequently develop pinhole leaks at factory crimps or weld joints. This happens due to internal condensation pooling. When the engine runs, water vapor condenses in the cooler parts of the exhaust, creating acidic moisture that eats through the metal from the inside out. These offer moderate repair viability, depending on how far the internal rust has spread.
Structural pipe cracks and blowholes present large voids caused by advanced oxidation. These have low viability for paste alone. You cannot bridge a massive hole with a ceramic paste; it will simply fall through or blow out under pressure. These defects require bandages, custom metal patching, or mechanical sleeves to bridge the gap effectively.
Evaluate the remaining wall thickness of the surrounding pipe. Take a flathead screwdriver and press firmly against the metal around the leak. If the metal yields, crunches, or flakes away under moderate pressure, a sealer will fail. The paste needs solid, stable metal to adhere to. If the substrate is rotting, the sealer will just fall off along with the next layer of rust.
Assess the location carefully. Sealers should generally not be used upstream of the catalytic converter or on exhaust manifolds. Temperatures in these zones routinely exceed 2,000°F (1,093°C), and the exhaust gas pressure is at its highest. Chemical sealants applied here will quickly degrade, crack, and blow out.
Exhaust Zone | Typical Temperature | Pressure Level | Sealer Viability |
|---|---|---|---|
Exhaust Manifold / Headers | 1,200°F - 2,500°F | Very High | Low (Welding/Replacement Recommended) |
Downpipe (Pre-Cat) | 800°F - 1,500°F | High | Low to Moderate |
Catalytic Converter | 1,000°F - 1,600°F | High | Low (Do not apply directly to cat body) |
Resonator / Mid-Pipe | 400°F - 800°F | Moderate | High (Ideal for pastes and bandages) |
Muffler / Tailpipe | 200°F - 500°F | Low | Very High |
Selecting the right product is critical for a lasting repair. Different formulations handle heat, vibration, and gap sizes differently. Using the wrong chemistry for your specific leak guarantees a comeback.
These pastes cure into a hard, metal-like mass when exposed to heat. They utilize a sodium silicate base mixed with ceramic or iron powders. When the water in the paste evaporates during the heat cycle, the silicates crystallize, forming a rigid structure that is highly resistant to chemical breakdown and extreme temperatures.
They work best for slip-fit connections, sealing new clamp installations, and filling hairline cracks. Because they cure to a rigid state, they cannot handle significant flexing. If the exhaust system moves excessively, the cured paste will fracture.
This category utilizes a heat-resistant resin combined with a woven fiberglass matrix to bridge gaps. They are best for spanning physical holes (up to 1-2 inches) where paste alone would fall through. The fiberglass provides a structural web for the resin to cling to during the curing process.
When applying a bandage, you wrap it tightly around the damaged pipe section. As the exhaust heats up, the resin impregnating the fiberglass hardens, creating a composite cast around the pipe. This is highly effective for straight sections of mid-pipe that have developed rust holes.
These are flexible metal-reinforced or resin-impregnated adhesive strips wrapped tightly around joints to form a structural gasket. They are best for re-sealing classic Ford-style joints, flared sleeves, and slightly misaligned pipe sections.
Ribbons are particularly useful when you have a joint that won't quite seat perfectly. You wrap the ribbon around the male end of the pipe, slide the female end over it, and clamp it down. The ribbon crushes and fills the irregular voids, preventing gas from escaping.
High-temperature Room Temperature Vulcanizing (RTV) silicone remains flexible after curing. It is best for flange gaskets and low-temperature tailpipe sections. Because it stays pliable, it handles vibration and thermal expansion much better than rigid ceramic pastes.
However, RTV silicone has strict limitations. It cannot withstand the direct heat of headers or catalytic converters. Most high-temp copper RTV maxes out at 700°F (371°C) intermittent. If you use it too close to the engine block, it will burn up, turn to ash, and blow out, leaving you with a massive leak and a terrible smell.
To ensure a lasting repair, evaluate the specific demands of your exhaust system against the capabilities of the sealant. You must read the technical data sheet of the product you intend to use.
Compare the peak operating temperature of the leak location against the product's maximum threshold. Manifolds require 2000°F+ ratings. Tailpipes may only require 500°F ratings. Using a low-temp silicone on a high-heat component will result in immediate failure and toxic smoke. Always err on the side of caution and select a product rated for at least 300°F higher than your estimated operating temperature.
Assess the manufacturer's maximum gap tolerance. Pastes applied thicker than 1/4 inch often suffer from thermal shock. The outside of the thick paste blob cures and hardens, trapping moisture inside. When that trapped moisture boils, it expands and blows the cured shell apart. If the gap is larger than 1/4 inch, you must use a bandage or a metal patch in conjunction with the sealer.
Evaluate ambient application temperatures. Most sealants require application above 50°F (10°C) and a 30-minute to 24-hour ambient set time before heat curing. Rushing this step traps moisture inside the paste, causing it to blow out when the engine starts. If you are working in a freezing garage, you must use a heat gun to gently warm the metal pipe and the ambient air around the repair before applying the paste.
Proper application requires patience and strict adherence to preparation protocols. Skipping steps here guarantees failure.
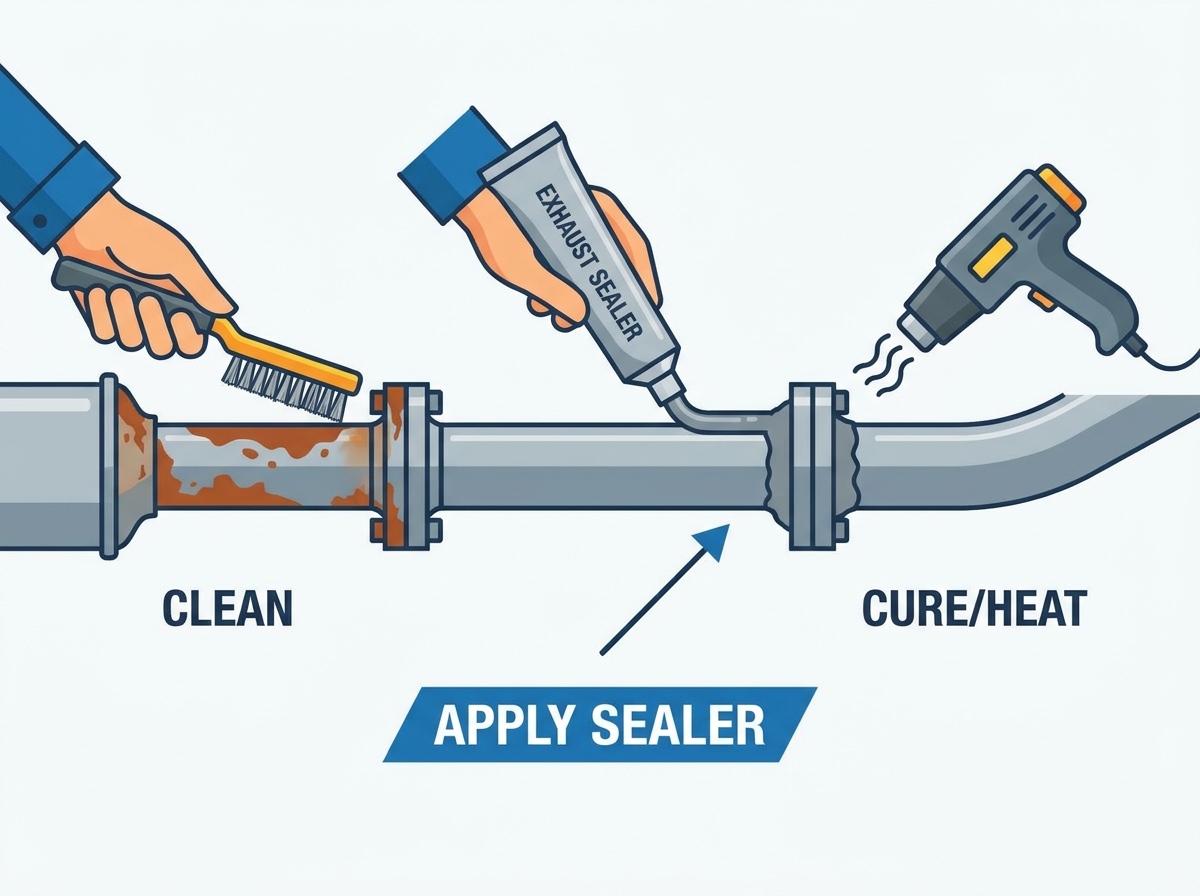
Mechanical cleaning is your first step. You cannot apply sealer over rust, scale, or soot. Use a wire brush, emery cloth, or an angle grinder with a wire wheel to strip the area down to bare, shiny metal. Extend the prepped area at least 2 inches beyond the actual leak. This gives the sealer a wide, clean margin to grip.
Next, perform chemical degreasing. Flush the area with non-chlorinated brake parts cleaner or pure acetone to remove carbon soot, oil, and moisture. Wipe it down with a clean, lint-free shop rag. Allow the solvent to flash off completely before applying the sealer. Any residual solvent will thin the paste and ruin its chemical structure.
For slip-fit joints, apply a continuous 1/8-inch bead to the inside of the female pipe and the outside of the male pipe before sliding them together. This creates an internal gas-tight seal. Do not just smear it on the outside of the joint after assembling the pipes; the exhaust pressure will easily push an external patch away.
For external cracks or muffler leaks, apply the paste in progressive, thin layers (approximately 1/16 to 1/8 inch) rather than one thick slab. This prevents trapped moisture pockets from vaporizing and blowing out during the heat cure. Use a putty knife or a wetted gloved finger to feather the edges smoothly against the bare metal.
For highly visible, high-vibration motorcycle slip-fits, mask off surrounding chrome or polished surfaces with painter's tape before application. Wipe away excess wet squeeze-out immediately with a damp microfiber cloth to prevent permanent cosmetic staining. Once silicate paste hardens on chrome, it is incredibly difficult to remove without scratching the finish.
Relying solely on the adhesive properties of the sealer is risky. Mechanical force is usually required. If a pipe joint is out-of-round, applying a ribbon or clamp alone will not stop the leak. You must apply a generous layer of high-temperature metallic paste directly onto the pipe joint, wrap it with an exhaust ribbon, and then torque the clamp over the wet assembly to force the paste into the irregular gaps.
Install U-bolts, band clamps, or exhaust sleeves over the sealed joint while the paste is still wet. The sealer acts as the gasket; the clamp provides the structural rigidity needed to withstand exhaust pressure and vibration. Tighten the clamps to the manufacturer's specified torque rating. Do not overtighten, as this can crush the pipe and create new leaks.
Allow the required ambient set time, which is often 30-60 minutes depending on humidity and temperature. Do not start the engine immediately. Once the ambient set time has passed, start the engine and let it idle for 10-15 minutes. The exhaust gas heat slowly bakes the moisture out of the ceramic/metallic paste, cross-linking the compound into a hardened shell.
Avoid revving the engine during this phase. Revving creates sudden spikes in exhaust backpressure, which can cause a blowout before the cure is complete. Let the engine idle smoothly until the pipe reaches full operating temperature, then shut it off and let it cool completely. This thermal cycle locks the sealer in place.
Even with careful application, specific risks can compromise the repair. Understanding these failure modes allows you to build a more robust fix.
High exhaust pressure can dislodge the wet paste before it hardens. This usually happens when users get impatient and start the car immediately after applying the paste. To mitigate this, strictly adhere to ambient drying times before introducing exhaust pressure. For larger gaps, use an internal wire mesh to hold the paste in place while it sets. The mesh acts like rebar in concrete, giving the paste structural support against the gas pressure.
The hardened sealer might crack and flake off after a few weeks of driving due to engine movement and rapid heating and cooling. Ceramic pastes are brittle. Ensure exhaust hangers and rubber isolators are intact. If your rubber hangers are torn, the entire exhaust system will swing wildly over bumps. Excessive exhaust system movement will destroy any rigid chemical seal, regardless of how well it was applied. Replace broken hangers before attempting a chemical seal.
Failure Mode | Primary Cause | Prevention Strategy |
|---|---|---|
Paste blows out immediately | Engine revved before full cure | Idle engine only for 15 mins; do not touch throttle. |
Sealer flakes off after 1 week | Applied over rust or soot | Grind to bare metal; use brake cleaner. |
Cracking around the joint | Excessive pipe vibration | Replace worn rubber exhaust hangers. |
Paste bubbles and pops | Applied too thick | Apply in thin 1/8-inch layers; allow drying between coats. |
Fixing an exhaust leak with chemical compounds requires precision, patience, and the right materials. When executed correctly, it provides a durable seal that restores engine performance and eliminates dangerous fumes.
Inspect the entire exhaust system to confirm the metal is structurally sound enough to support a chemical repair.
Grind the repair zone down to bare metal and degrease it thoroughly before applying any product.
Apply the sealer in thin layers, utilizing mechanical clamps or fiberglass bandages for structural reinforcement.
Follow the manufacturer's thermal curing process strictly, allowing the engine to idle without revving.
Check your rubber exhaust hangers and replace any torn isolators to prevent vibration fractures.
A: Most sealers require 30 to 60 minutes of ambient drying time, followed by 10 to 15 minutes of engine idling to heat-cure the paste into a hardened shell. Always verify the specific times on the product label.
A: Generally, no. Temperatures near the catalytic converter often exceed the maximum rating of most paste sealers, leading to rapid failure. Welding or component replacement is recommended for this zone.
A: No. Sealers lack structural strength. A completely severed pipe requires a mechanical sleeve and heavy-duty clamps in addition to the sealer to hold the pieces together securely.
A: Failures usually result from applying the paste too thickly, inadequate surface preparation (leaving rust or soot on the metal), or excessive exhaust system vibration due to broken rubber hangers.
A: Yes, whenever possible. The paste acts as a gasket to fill microscopic gaps, while the clamp provides the necessary clamping force and structural rigidity to prevent movement under pressure.
A: Cured ceramic sealer is extremely hard. You must use a wire wheel on an angle grinder, a heavy grit flap disc, or a hammer and chisel to break the bond and scrape it off the metal.
A: If you are unsure which compound fits your specific application, reach out to technical support through our contact us page for expert guidance.


