


Views: 0 Author: Site Editor Publish Time: 2026-07-21 Origin: Site


An exhaust leak often announces itself before you ever open the hood. You might notice a rhythmic ticking engine noise, a high-pitched whistling under acceleration that sounds like a dollar-store supercharger, or sudden drops in fuel economy. In worst-case scenarios, dangerous exhaust fumes can seep directly into the passenger cabin. Vehicle owners face a stark choice between expensive professional welding or component replacement and DIY repair methods. The challenge is identifying which DIY methods yield a durable seal versus which result in immediate failure due to heat, vibration, and poor joint alignment. We will introduce a framework for diagnosing the exact location of the leak—especially common post-installation whistles at component interfaces—and evaluating whether an exhaust joint sealer, mechanical clamp, or fiberglass patch is the technically appropriate solution for the specific component failure.
Preparation Dictates Success: The longevity of any chemical or epoxy repair is entirely dependent on removing rust and carbon deposits down to bare metal using wire brushes and solvent, plus pre-treating seized hardware to avoid broken exhaust studs.
Application Limits: High-temperature exhaust joint sealer is highly effective for sealing slip joints, flanges, and pinholes, but lacks the structural integrity to bridge large gaps or support broken pipes.
Mechanical vs. Chemical Fixes: Straight pipe fractures require mechanical band clamps or sleeve connectors, whereas irregular joints and muffler seams are better suited for chemical sealers and pastes.
Inspection Compliance: DIY exhaust repairs may resolve noise and fume issues, but their acceptability for state emissions inspections varies based on local regulations and the proximity of the repair to the catalytic converter.
Establishing the baseline requirements for a successful repair starts with accurate identification. You must pinpoint the leak's exact location, measure its size, and evaluate its structural impact on the exhaust system. Guessing where the noise originates often leads to wasted materials and persistent leaks. A proper diagnosis prevents you from applying chemical patches to structural failures that require mechanical support.
Finding a leak on a hot exhaust system is dangerous and difficult. Instead, safely pressurize the exhaust system using a shop vac while the engine is completely cold. This method allows you to inspect the entire system without the risk of severe burns.
Connect the vacuum hose to the blower port of your shop vac.
Tape the other end of the hose securely into the tailpipe to force air backward through the system.
Mix a simple solution of dish soap and water in a spray bottle.
Generously apply this soapy water to all joints, welds, and flanges.
Watch for active bubbling, which indicates where the pressurized air is escaping through compromised areas.
Pay close attention to common failure zones. Check catalytic converter connections, muffler weep holes, rusted slip joints, and rusted tailpipe hangers. You should also listen for the dreaded post-installation whistle. Newly installed aftermarket catalytic converters or mufflers often whistle due to micro-gaps at the flange connection or improper mating alignment. The soapy water will reveal these tiny imperfections immediately.
Not all exhaust damage can be fixed in a driveway. You must define the threshold for DIY viability. Pinholes, minor seam separations, and loose flanges are excellent candidates for chemical sealers and basic hand tools. These issues do not compromise the physical strength of the exhaust pipeline.
Structural failures require professional welding or complete component replacement. Completely severed pipes, massive rust rot that crumbles under pressure, and cracked exhaust manifolds near the engine block exceed DIY repair limits. Manifold temperatures easily surpass the thermal thresholds of most retail sealers. Attempting to patch a structural break with paste will fail as soon as the vehicle hits a bump.
Categorizing repair methods based on component location, heat exposure, and required structural strength ensures a permanent fix. Choosing the wrong material guarantees a repeat repair.
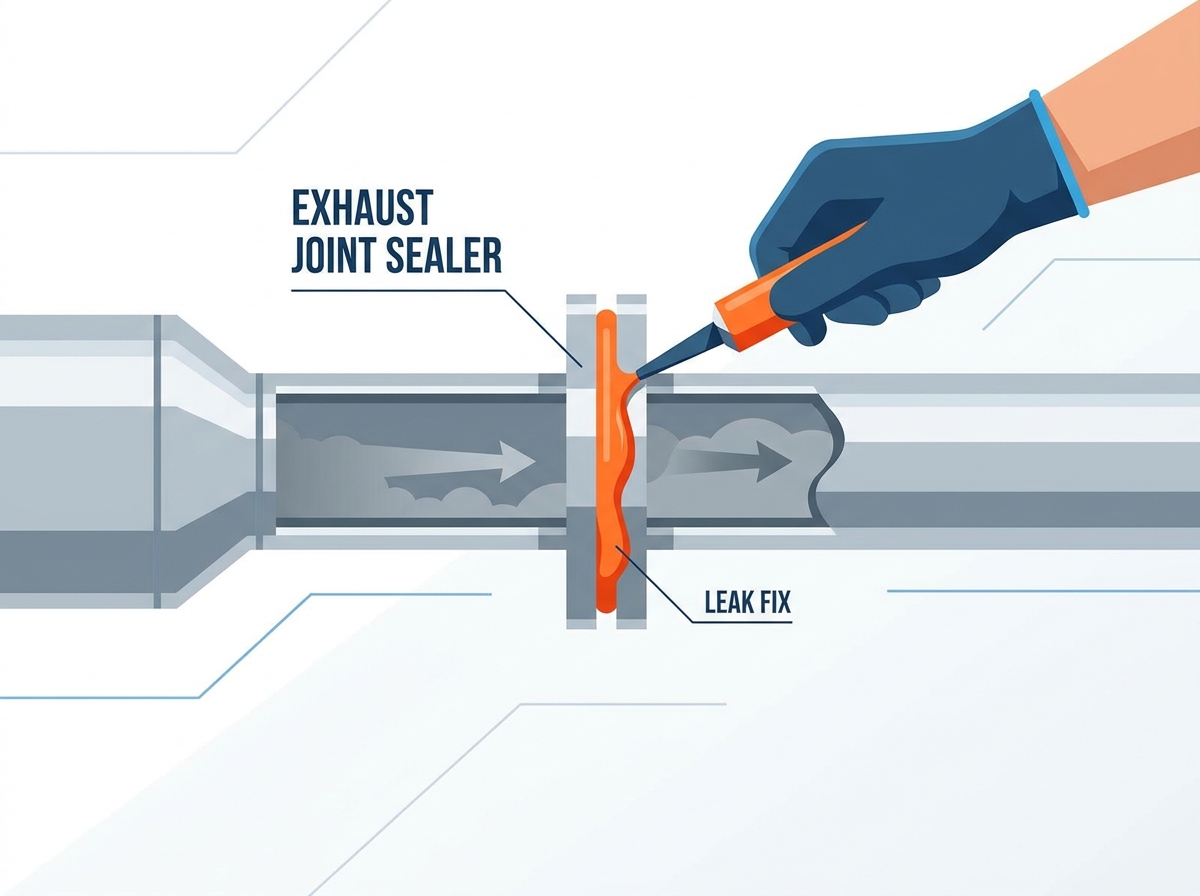
Chemical pastes and epoxies are designed for specific sealing applications. Their primary use case involves sealing slip joints, mating flanges, and small pinholes where structural support already exists.
These compounds cure via exhaust heat. Once exposed to operating temperatures, they form a hard, ceramic-like seal that resists extreme heat. However, they have distinct limitations. The cured material is highly brittle. It cannot handle extreme pipe flexing or bridge gaps larger than a few millimeters. It acts as a gasket, not a structural brace.
When physical strength is compromised, mechanical fixes take priority. Band clamps and sleeve connectors are the best use case for straight pipe breaks or connecting two pipes of the same diameter.
They work through mechanical compression. You tighten heavy-duty bolts to crush an inner metal sleeve tightly over the leak. This method is highly durable and structurally sound. It requires sufficient straight pipe clearance to seat properly. For the best results, mechanics often combine a mechanical clamp with a thin layer of exhaust joint sealer to guarantee a completely gas-tight fit.
Irregular surfaces require flexible solutions. Exhaust tape and fiberglass patches are best utilized for muffler body cracks or larger holes in low-stress tailpipe sections.
These products feature a heat-activated resin embedded in a fiberglass mesh tape. You wrap the tape tightly around the pipe, and the exhaust heat hardens the resin into a rigid cast. While good for irregular shapes, they remain prone to failure if the underlying rust continues to expand beneath the patch.
Avoid outdated farmer's hacks at all costs. Wrapping a tin coffee can and bailing wire around a broken pipe is a dangerous practice. This fails to create a gas-tight seal and causes destructive metal-on-metal vibration. More importantly, it poses a severe carbon monoxide hazard as toxic fumes easily escape the loose metal wrap.
Repair Method | Best Application | Mechanism | Primary Limitation |
|---|---|---|---|
Joint Sealer / Paste | Slip joints, flanges, pinholes | Heat-cured ceramic seal | Brittle; no structural strength |
Band Clamps | Straight pipe breaks | Mechanical compression | Requires straight pipe clearance |
Fiberglass Tape | Muffler bodies, irregular shapes | Heat-activated resin wrap | Fails if underlying rust expands |
Step-by-step execution determines how long the repair survives. Focusing on the critical failure points of chemical repairs prevents premature blowouts.
Exhaust hardware lives in a hostile environment of extreme heat and road salt. Pre-soaking rusted flange nuts and clamp bolts is mandatory. Use a dedicated high-performance penetrating oil before attempting any disassembly. Spray the threads and let the oil sit for several hours, or ideally overnight.
Forcing a seized nut carries a high risk of shearing studs, especially on catalytic converter flanges. If a bolt resists, apply heat with a torch to expand the metal, then apply more penetrating oil as it cools. Work the hardware back and forth slowly to safely back out stubborn threads.
Chemical sealers cannot bond to rust, soot, or grease. Aggressive mechanical abrasion is an absolute necessity. Use wire brushes, emery cloth, or coarse sandpaper to remove all loose rust and scale. You must strip the application area down to bare, shiny metal.
Once the metal is exposed, proceed to chemical prep. Wipe the entire area with isopropyl alcohol, brake cleaner, or a highly volatile solvent. This removes grease, lingering penetrating oil residues, and carbon soot. Do not touch the cleaned area with bare hands before applying the sealer.
Application methods vary based on the joint type. For a slip joint, apply a continuous bead of sealer to the inside of the female pipe before assembly. Slide the pipes together and twist slightly to distribute the paste evenly. For a flange connection, apply the sealer externally around the mating surface or directly onto the exhaust gasket.
Pay strict attention to thickness constraints. Apply enough material to fill voids and bridge micro-gaps. However, do not apply so much paste that it squeezes into the interior of the exhaust pipe. Internal blockages restrict exhaust flow, create unwanted backpressure, and negatively impact engine performance.
Follow standard curing protocols strictly. Allow the paste an initial ambient cure time as directed by the manufacturer. This lets the solvents evaporate. Next, perform an engine idle heat cycle. Start the vehicle and let it idle for ten to fifteen minutes. The gradual heat builds the ceramic bond.
Avoid rapid acceleration or high-revving before the sealer has fully crystallized. Sudden spikes in exhaust pressure easily blow out uncured paste, forcing you to start the process over from scratch.
Environmental factors constantly degrade DIY exhaust repairs. Understanding these forces helps you set realistic expectations for your fix.
Exhaust systems endure massive temperature swings. Thermal expansion and contraction stress rigid ceramic sealers. As the metal pipes heat up and expand, the brittle paste must hold its bond. Over time, this constant shifting can cause microscopic cracks.
Engine vibration acts as a secondary destructive force. Worn or broken rubber exhaust hangers allow the heavy steel pipes to bounce and sway. This excessive movement accelerates the cracking of chemical patches. Replacing worn hangers is a cheap way to protect your repair work.
Most premature failures stem from user error during application. Applying sealer over active rust or oily residues guarantees immediate bond failure. The paste simply flakes off the dirty surface.
Using standard household epoxies or silicones not rated for extreme exhaust temperatures creates a severe melting and fire hazard. Always verify the temperature rating of your materials. Finally, attempting to use chemical sealers as structural support for a broken pipe without mechanical backing will fail instantly. Paste cannot hold two heavy pipes together over a pothole.
Vehicle owners must weigh immediate financial savings against long-term reliability when choosing between DIY and professional services.
The cost comparison heavily favors driveway repairs. Tubes of high-temp paste and heavy-duty mechanical clamps cost a fraction of standard shop labor rates and professional welding services. A DIY repair keeps significant money in your pocket.
Time investment is also a factor. A thorough DIY prep, application, and curing process takes roughly one to two hours. This is often faster than scheduling shop time, dropping off the vehicle, and waiting for a mechanic to complete the work. If you need further guidance on selecting materials, you can always contact us for technical support.
While a paste or clamp can stop an annoying leak, heavily patched systems face scrutiny during state visual inspections. Some jurisdictions fail vehicles with visible exhaust tape or excessive paste near emissions equipment.
Leaks located before the catalytic converter are particularly problematic. Pre-catalytic converter leaks draw fresh oxygen into the exhaust stream. This skews O2 sensor readings, triggers a Check Engine Light, and alters the engine's air-fuel mixture. These upstream connections require absolute gas-tight seals to maintain proper engine management and pass emissions testing.
Inspect your rubber exhaust hangers and replace any that are stretched or broken to reduce vibration on the new repair.
Purchase the appropriate high-temp sealer, mechanical clamp, or fiberglass wrap matched specifically to your component failure type.
Acquire necessary safety gear, including safety glasses, sturdy jack stands, and stiff wire brushes, before beginning the surface preparation.
Perform a cold-engine soapy water test to verify the exact location of the leak before applying any chemical compounds.
A: When applied correctly to clean, bare metal, a high-quality sealer can last for several years. Its lifespan depends on the amount of joint vibration, the severity of thermal expansion, and whether the underlying metal continues to rust. Worn exhaust hangers will significantly reduce its longevity by increasing stress on the brittle cured paste.
A: No. Standard epoxies and household adhesives are not formulated to withstand the extreme temperatures of an exhaust system. Using them creates a severe melting and fire hazard. You must use specialized high-temperature exhaust pastes or extreme-heat epoxies specifically rated for automotive exhaust applications.
A: It depends on your local regulations and the location of the patch. While a proper seal stops the leak, many strict state visual inspections will fail a vehicle if they see fiberglass tape or excessive paste, especially if the repair is located near or on the catalytic converter.
A: You can safely find leaks using a shop vacuum and soapy water. With the exhaust completely cold, tape the vacuum hose to the tailpipe and set it to blow air into the system. Spray soapy water on all joints, flanges, and welds. Active bubbling will reveal the exact location of the leaks.
A: Driving with an exhaust leak poses safety risks. Even minor leaks can allow dangerous carbon monoxide fumes to enter the passenger cabin, especially when idling in traffic. Additionally, leaks near the engine can melt surrounding plastic components or wiring harnesses due to escaping hot gases.
A: A post-installation whistle usually indicates a micro-gap at the flange connection or improper mating alignment between the new and old components. Even tiny imperfections allow high-pressure gas to escape, creating a high-pitched sound. Applying a thin layer of high-temp paste to the gasket surface during assembly usually resolves this issue.


