


Views: 0 Author: Site Editor Publish Time: 2026-07-17 Origin: Site


An exhaust leak immediately announces itself through excessive engine noise, toxic cabin fumes, and noticeably decreased fuel efficiency. Left ignored, these leaks often lead to failed emissions inspections and potential damage to surrounding vehicle components. The intense thermal stress and constant vibration of an exhaust system make repairs challenging. Many drivers face a difficult choice between paying for expensive professional welding or attempting a repair at home.
While full system replacement or professional welding provides structural permanence, the market for non-welding fixes offers highly practical alternatives. Using sub-standard materials or applying the wrong fix to a high-stress area will result in rapid failure. This guide provides an evidence-based evaluation of non-welding repair methods. We will examine sealers, heat-activated tapes, mechanical clamps, and all-in-one kits to help you choose the right solution based on leak severity, location, and thermal constraints.
Location Dictates the Solution: High-temperature zones (manifolds, catalytic converters) require different specialized compounds than lower-temperature tailpipes and mufflers.
Preparation is Non-Negotiable: The failure rate of any exhaust leak sealer, tape, or wrap is directly tied to poor surface preparation (failure to aggressively remove scale rust and carbon soot).
Mechanical vs. Chemical: Chemical sealers are ideal for pinholes and joint sealing, while structural breaks require mechanical clamping, sleeves, or professional welding.
Temporary vs. Permanent: Define realistic expectations—most DIY chemical and tape fixes are stopgaps, whereas heavy-duty band clamps combined with high-temp sealers offer robust, long-term structural solutions.
Working under a vehicle on exhaust components carries inherent risks. Rust, sharp metal edges, and heavy components require strict safety protocols before any repair begins. You need a solid plan and the right gear to get the job done without injury.
Never rely on a standard hydraulic jack alone when working under a vehicle. Secure vehicle elevation using heavy-duty wheel ramps or rated jack stands on a flat, stable surface. Eye protection is an absolute necessity. Exhaust systems accumulate thick layers of rust and carbon. The moment you begin scraping or unbolting components, sharp rust flakes and debris will fall directly toward your face. Wear heavy leather gloves to protect your hands from jagged metal edges and hot components.
Successful non-welded repairs require a specific set of manual tools to prepare the surface and secure the materials properly. Having these ready prevents mid-job delays.
Metal snips or a hacksaw for cutting away jagged, rotted metal edges and shaping wire mesh.
Hand tools, including flat-head screwdrivers and socket wrenches, for securing U-bolts, band clamps, or Jubilee clips.
Coarse wire brushes and heavy-grit sandpaper to strip rust and expose bare metal.
A tape measure or digital caliper to accurately determine pipe diameters before purchasing clamps.
A shop vacuum with a blower function to test for leaks while the exhaust is cold.
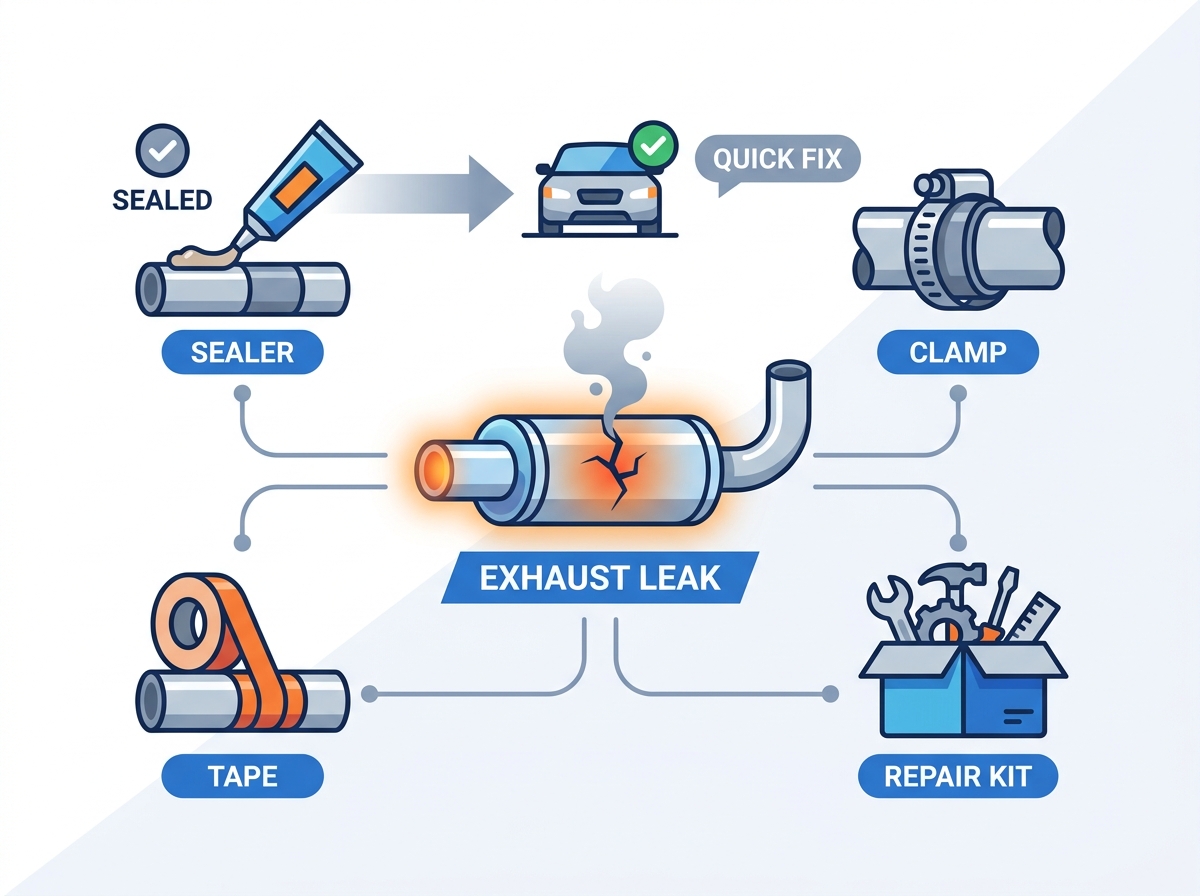
Not all exhaust leaks can be fixed with tape or paste. Accurately diagnosing the location and severity of the damage dictates whether a non-welded repair will hold. You have to know exactly what you are dealing with before applying any product.
The exhaust system features a steep temperature gradient. The exhaust manifold and catalytic converter operate in extreme heat zones, often exceeding 1000°F (540°C). Mid-pipes, mufflers, and tailpipes operate at much lower temperatures, typically around 300°F (150°C). Operating temperatures dictate the maximum thermal rating required for any repair product. Applying a standard low-temp epoxy near the manifold will result in immediate burning and failure. Always verify the maximum temperature rating of your chosen material against the specific zone you are repairing.
Exhaust Component | Average Operating Temperature | Recommended Repair Material Type |
|---|---|---|
Exhaust Manifold | Up to 1200°F (650°C) | Extreme-temp ceramic paste, professional welding |
Catalytic Converter | 1000°F - 1600°F (540°C - 870°C) | Professional replacement or welding only |
Mid-Pipe / Resonator | 400°F - 600°F (200°C - 315°C) | High-temp silicone, band clamps, fiberglass wrap |
Muffler / Tailpipe | 200°F - 400°F (90°C - 200°C) | Standard exhaust putty, epoxy tape, sleeves |
You must differentiate between cosmetic leaks and structural failures. Minor leaks include pinholes, hairline cracks, and loose slip-joint flanges. These are excellent candidates for chemical and tape repairs. Structural failures involve completely sheared pipes, massive rust rot, or broken hangers. Non-welded fixes cannot safely restore structural load-bearing capacity to a fully separated pipe. If the pipe flexes or sags independently of the system, you must use a mechanical sleeve or seek professional welding.
Chemical pastes and putties offer a fast way to plug small gaps, provided you understand their curing requirements and pressure limitations. They are highly effective when used in the correct context.
Common sealers utilize iron-reinforced epoxy resins, ceramic-based pastes, or high-temperature silicone gasket makers. Specialized sealing pastes harden into a rigid, cement-like shell designed to withstand direct exhaust heat. Conversely, extreme-temperature silicones remain slightly flexible, making them excellent for sealing bolted flanges that experience heavy vibration. The curing process varies by product. Some require heat-curing by running the engine at idle, while others demand an overnight air cure. Following the manufacturer's thermal cycling instructions ensures the compound bonds correctly to the metal.
A high-quality exhaust leak sealer performs best in low-stress applications. Ideal uses include sealing slip joints during new exhaust installations, filling minor pinholes caused by localized corrosion, and acting as an auxiliary gasket maker for warped bolted flanges. They excel at blocking microscopic gas leaks that cause ticking noises. You apply the paste generously, smooth it out, and let it cure to form a solid barrier against escaping gases.
The primary failure mode for chemical putties is blowout. Exhaust systems generate significant backpressure. If you rev the engine before the sealer has fully cured, the exhaust gas will punch a hole straight through the soft paste. To mitigate this risk, strictly observe idle-only curing times. Avoid using paste alone on holes larger than a few millimeters. For larger gaps, you must embed a supporting metal mesh into the paste to provide structural backing against the gas pressure.
For straight sections of pipe suffering from cracks, heat-activated bandages provide a rigid, wrap-around solution. They create a cast around the pipe to hold gases in.
Exhaust tape typically consists of a woven fiberglass bandage impregnated with a heat-activated epoxy resin. The application process involves wetting the bandage to activate the resin, wrapping it tightly around the damaged pipe with overlapping layers, and smoothing the edges. Once applied, you run the engine. The exhaust heat bakes the resin, hardening the fiberglass shell into a rigid structural sleeve that seals the leak.
Bandages require a uniform surface to wrap around. Straight pipe sections between the catalytic converter and the muffler are the best candidates. They effectively seal minor, non-structural cracks and small rust holes where a chemical paste alone would blow out. The overlapping layers provide a decent amount of strength against internal pressure.
Tape repairs have distinct limitations. They suffer from poor adhesion on curved joints, Y-pipes, or sharp bends where the bandage cannot lay flat. Because the hardened fiberglass sits on the exterior of the pipe, it remains highly susceptible to damage from road debris and speed bumps. Furthermore, if the underlying metal is completely rusted through, the tape cannot hold the two pipe halves together under vibration.
When structural integrity is compromised, mechanical clamping provides the strongest non-welded repair available. Metal holding metal is always the most secure option.
Standard budget U-bolts and Jubilee clips offer basic clamping force but often crush or distort the underlying pipe, creating new exhaust leaks at the crimp points. Wide, stainless steel band clamps distribute pressure evenly across a larger surface area. This even distribution seals the connection tightly without damaging the pipe geometry, making them far superior for joining two sections of exhaust tubing.
Clamp Type | Best Application | Pros | Cons |
|---|---|---|---|
U-Bolt Clamp | Hanging pipes, temporary holds | Cheap, widely available | Crushes pipe, poor gas seal |
Band Clamp (Lap Joint) | Joining pipes of different diameters | Even pressure, good seal | Requires exact sizing |
Band Clamp (Butt Joint) | Joining pipes of the same diameter | No pipe distortion, strong hold | Can be difficult to align perfectly |
V-Band Clamp | Performance exhaust systems | Quick release, perfect seal | Requires welded flanges |
The most effective professional DIY method combines mechanical and chemical solutions. Before sliding a band clamp or connector sleeve over the damaged joint, apply a generous layer of extreme-temperature silicone or sealing paste to the inside of the sleeve. Tightening the clamp forces the sealer into any microscopic gaps. This hybrid approach addresses both structural rigidity through the metal sleeve and gas-tight sealing through the chemical compound.
Severely damaged, crimped, or rotted pipe sections cannot be clamped effectively. You must use metal snips or a hacksaw to cut away the compromised metal, leaving clean, round edges. You can then bridge the gap using a dedicated exhaust connector sleeve. This requires accurate pipe diameter measurements. You must know the exact outside diameter and inside diameter of your pipes to ensure a tight slip-fit. Additionally, verify you have sufficient clearance around the chassis to fit the clamp hardware and tighten the bolts.
Retailers frequently stock all-in-one exhaust repair kits promising a complete solution in a single box. They bundle everything you need for a quick patch job.
A typical kit bundles several repair methods together. You will generally find a fiberglass patch or bandage, a small square of metal wire or mesh backing, a piece of coarse sandpaper, and a pouch of specialized sealing paste or epoxy. This saves you from hunting down individual components in the auto parts store.
Kits offer excellent convenience for emergency roadside repairs or quick weekend fixes. However, buying higher-quality standalone components often yields better long-term results. Purchasing a premium stainless steel band clamp and a high-grade RTV silicone separately provides a much stronger fix than the thin materials found in budget kits. If you do use a kit, the included metal mesh is the most valuable component, as it provides the crucial backing required to prevent the paste from blowing out over larger holes.
The single biggest reason non-welded exhaust repairs fail is inadequate surface preparation. Adhesives cannot bond to dirt, rust, or carbon buildup.
No sealer, putty, or tape will bond to rust scale, road grime, or exhaust soot. You must strip the pipe down to bare metal. Use heavy-duty wire brushes and coarse sandpaper to aggressively scrub the repair area. Extend your cleaning at least two inches beyond the actual leak. Use metal snips to trim away any jagged, paper-thin rusted edges until you reach solid, thick metal.
After mechanical scrubbing, invisible oils and residues remain on the pipe. Use a quick-evaporating solvent, such as brake cleaner or acetone, to wipe down the bare metal. Allow the solvent to flash off completely before applying any chemical adhesive or heat-activated tape. This ensures maximum adhesion and prevents premature peeling.
Evaluating the practical aspects of exhaust repair helps determine the best path forward. You have to weigh your time and effort against the permanence of a professional weld.
DIY materials offer a highly economical alternative to shop labor. Pastes, sealers, and fiberglass wraps represent a minor investment compared to professional welding. Heavy-duty stainless steel band clamps require a slightly larger upfront purchase but provide significantly better durability. When comparing these options, the hybrid approach of combining a quality clamp with a reliable sealer offers the best return on investment for structural leaks, effectively extending the life of the exhaust system without the immediate need for complete replacement.
Repairing an exhaust leak without welding requires careful assessment and proper material selection. Follow these steps to ensure a successful repair:
Inspect the entire exhaust system to identify the exact location and operating temperature of the leak.
Aggressively clean the damaged area with wire brushes and degreaser to ensure a strong bond.
Select a chemical paste for pinholes, a fiberglass wrap for straight-pipe cracks, or a band clamp for structural joints.
Combine mechanical clamps with high-temperature sealers for the most durable non-welded repair.
If you require assistance selecting the right repair compounds for your vehicle, contact our team for expert guidance.
A: Curing times depend on the specific product chemistry. Many ceramic-based pastes require running the engine at idle for 10 to 15 minutes to heat-cure the compound. Silicone-based RTV sealers typically require 1 hour to tack and 24 hours to fully air-cure before exposing them to high exhaust pressures.
A: No. Regular duct tape will melt and catch fire within minutes due to the extreme temperatures of the exhaust system. You must use specialized, heat-activated fiberglass exhaust bandages designed specifically to withstand temperatures exceeding 300°F.
A: Yes. An exhaust leak upstream of the catalytic converter or oxygen sensors will introduce unmetered air into the system. This skews the sensor readings, often triggering a Check Engine Light and causing the vehicle to fail an emissions inspection.
A: Driving with an exhaust leak poses significant safety risks. Leaks located under the cabin can allow toxic carbon monoxide fumes to seep into the passenger area. Additionally, hot exhaust gases escaping near fuel lines or plastic components create a severe fire hazard.
A: Blowouts usually occur due to poor surface preparation, applying the putty over a hole that is too large without wire mesh backing, or revving the engine before the compound fully cured. Backpressure easily pushes soft putty out of the gap.
A: Catalytic converters operate at extremely high temperatures, often exceeding 1000°F. Most standard exhaust putties and tapes will burn off. You must use an extreme-temperature rated ceramic compound specifically designed for manifold or converter applications, though welding is highly recommended here.


