


Views: 0 Author: Site Editor Publish Time: 2026-07-28 Origin: Site


A sudden, aggressive roar from your vehicle’s undercarriage usually signals an exhaust leak. This immediate change in noise brings anxiety regarding repair shop visits, potential safety hazards, and the threat of failing an annual inspection. The core dilemma becomes whether to attempt a DIY fix or schedule professional intervention. Understanding the critical difference between a cosmetic noise issue and dangerous carbon monoxide leaking into the passenger cabin is essential.
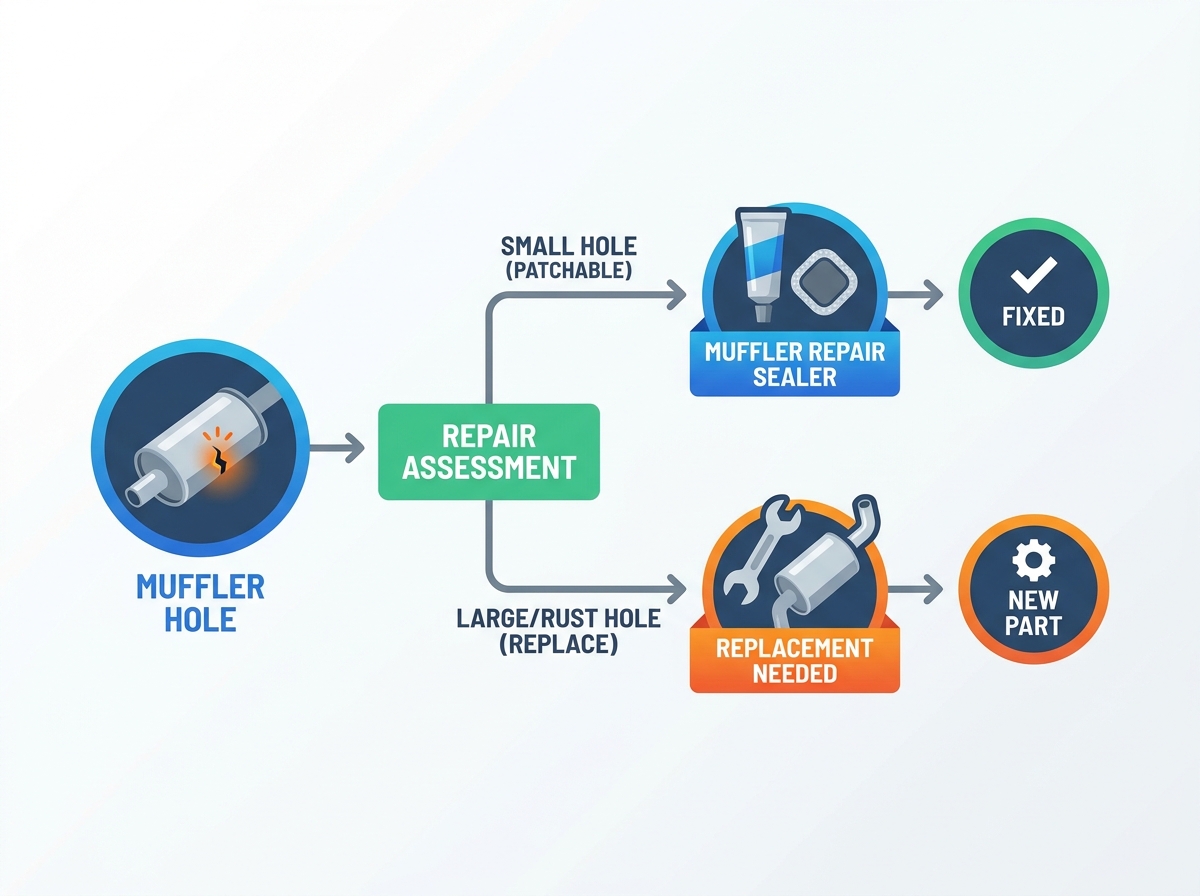
Before making a decision, you need a clear framework for evaluating the damage. The size of the hole, the structural integrity of the surrounding metal, and the location of the leak dictate your options. Depending on these factors, a chemical muffler repair sealer, a mechanical patch, or a full replacement might be the most viable path forward.
Size and Location Dictate the Fix: Pinholes and hairline cracks on flat surfaces are candidates for sealers; blowouts on seams or heavily rusted areas require replacement.
Chemical Limits: A high-quality muffler repair sealer is a viable, temporary-to-medium-term solution, provided the exhaust reaches optimal curing temperatures and the surface is properly prepped.
The Rust Factor: Patching over systemic corrosion is a guaranteed failure. Sealers require bare, solid metal to achieve a structural bond.
The Stress Variables: Unaddressed exhaust vibrations, broken hangers, or loose flanges will rapidly crack any DIY chemical patch or sealer.
Inspection Realities: DIY patches may silence the exhaust, but strict state safety and emissions inspections often reject non-welded exhaust repairs unless executed with approved structural sleeves.
Inspecting your exhaust system at least once a year is a smart maintenance habit. You should look underneath the vehicle immediately if you notice a change in exhaust tone. Catching a small leak early prevents it from expanding into a major structural blowout. Regular visual checks save you from extensive repairs down the road. Mechanics often spot these issues during routine oil changes when the vehicle is on the lift. You can do the same in your driveway with a good set of jack stands and a flashlight. Look for black soot marks around pipe joints and muffler seams. These carbon deposits are the first visual indicator of escaping exhaust gases.
Waiting too long allows hot exhaust gases to continuously erode the edges of a small pinhole. The metal heats up, oxidizes, and flakes away, turning a minor repair into a major headache. A proactive approach keeps the repair manageable. You want to catch the damage while the surrounding metal still has its structural integrity intact.
Finding a tiny pinhole leak isn't always obvious. A safe method is the soap bubble test performed on a cold-start exhaust system. Mix dish soap and water in a spray bottle. Spray the soapy solution over the suspected area before the pipes heat up. As the engine runs, escaping exhaust gases will create visible bubbles. This pinpoints the exact location of the leak without risking severe burns to your hands.
Another effective diagnostic trick involves a shop vacuum. Hook the vacuum hose to the exhaust tailpipe and set it to blow air into the system. Seal the connection with duct tape or a rag. With the engine off, crawl under the vehicle and spray your soapy water along the exhaust line. The pressurized air from the vacuum will push through any cracks or pinholes, creating bubbles. This method gives you unlimited time to inspect the entire system without the pipes getting hot.
There are physical limits to what you can patch. A chemical or bandage repair is generally suitable for pinholes or hairline cracks. The threshold where a hole becomes too large for these methods is typically anything larger than a dime without a backing plate. Massive blowouts require a more robust mechanical solution or replacement. When a hole exceeds a certain diameter, the exhaust pressure simply blows the chemical paste out before it can fully cure.
Damage Type | Visual Characteristics | Recommended Repair Method |
|---|---|---|
Pinhole Leak | Tiny black soot spot, less than 2mm wide | Chemical paste or high-temp epoxy |
Hairline Crack | Thin fracture along a flat pipe section | Chemical paste with fiberglass wrap |
Dime-Sized Hole | Visible opening, solid surrounding metal | Metal patch plate with chemical paste |
Seam Blowout | Split along the welded edge of the muffler | Mechanical sleeve or full replacement |
Structural Rot | Large jagged hole, flaking rust everywhere | Full component replacement |
The condition of the surrounding metal is the most critical factor. Use the screwdriver test by gently poking the area around the hole. If the metal flakes away easily or the screwdriver punches right through, patching will fail. The substrate continues to degrade underneath the patch. A muffler repair sealer needs solid, bare metal to adhere properly. Applying paste over rust is like painting over peeling wallpaper; it will fall off almost immediately.
Metal fatigue also plays a role. Exhaust systems endure constant heating and cooling cycles. This thermal expansion and contraction weakens the steel over time. If the pipe feels thin or sounds hollow when tapped with a wrench, the metal has fatigued past the point of a reliable chemical repair. You need a solid foundation for any patch to hold up against exhaust pressure and vibration.
Geometry dictates repair feasibility. Patching flat, accessible pipe sections has a high success rate. You can easily wrap a bandage or apply paste evenly. Conversely, sealing complex joints, flexible pipes, or rusted muffler seams is nearly impossible with chemical sealers alone. The location determines whether a DIY patch will hold up under pressure.
Flex pipes are particularly troublesome. They are designed to move and absorb engine vibration. Applying a rigid chemical paste to a flex pipe guarantees failure. The paste will crack and fall out the moment you start the engine and put the vehicle in gear. Similarly, leaks right at the catalytic converter flange often require professional welding due to the extreme heat and structural stress at that specific junction.
Exhaust sealers rely on specific chemistry to survive extreme environments. They cure via exhaust heat to form a ceramic or high-temp polymer bond. This cured material withstands temperatures exceeding 1000°F. Understanding this curing process is vital for a successful application. The paste goes on soft, allowing you to push it into cracks and smooth it over holes. Once exposed to the heat of the exhaust gases, the solvents evaporate, and the material hardens into a rock-solid seal.
The curing phase requires careful attention. If you rev the engine aggressively right after application, the exhaust pressure will blow the soft paste right out of the hole. You must let the vehicle idle gently. The gradual build-up of heat bakes the paste into place. Some products require a 24-hour resting period before you even start the engine. Always read the specific curing instructions on the package to ensure the chemical bond forms correctly.
Not all epoxies are created equal. Standard automotive epoxies will burn off quickly on an exhaust pipe. Dedicated exhaust putties and sealers are formulated specifically for high heat and vibration resistance. Matching the temperature rating of the product to the exhaust component ensures expected longevity. A product rated for 500°F might survive on a tailpipe but will instantly fail near the exhaust manifold.
Identify the location of the leak to determine the required temperature rating.
Select a ceramic-based paste for areas close to the engine block.
Choose a flexible, polymer-based sealant for mid-pipe sections that experience more vibration.
Verify the product is specifically labeled for exhaust or muffler repair.
Check the expiration date on the package, as old paste dries out and loses adhesion.
A common DIY hack involves using high-temp epoxy to bond a coin or steel washer over a small hole. While this no-tools fix works temporarily, it has drawbacks. Chemical compatibility of dissimilar metals under extreme heat causes premature failure. A copper penny and a steel exhaust pipe expand and contract at completely different rates. This thermal mismatch breaks the epoxy bond after a few drive cycles.
Using a piece of scrap exhaust tubing or a dedicated steel patch plate is a much better approach. You want the patch material to match the base metal as closely as possible. If you must use a washer, ensure it is uncoated steel. Galvanized washers release toxic zinc fumes when heated to exhaust temperatures. Always prioritize proper materials over quick hacks when dealing with high-heat automotive systems.
Be realistic about the lifespan of a chemical patch. A chemical paste is best framed as a cost-effective bridge solution. It extends the life of an aging exhaust system but is rarely a permanent, lifetime fix. Expect to monitor the repair and eventually replace the component. The patch buys you time to source replacement parts or schedule a shop visit.
Environmental factors heavily influence the lifespan of the repair. Vehicles driven in regions with heavy winter road salt will see patches fail faster. The salt accelerates corrosion around the edges of the repair. Conversely, a well-applied patch on a vehicle in a dry climate can last for a year or more. Regular inspections remain necessary to ensure the seal holds and exhaust gases aren't escaping.
Physical repair kits offer a step up from chemical sealers alone. Combining a fiberglass exhaust wrap or a metal sleeve with a sealer creates a composite fix. This method is effective for slightly larger holes where putty alone would blow out under pressure. The fiberglass wrap acts like rebar in concrete, providing structural support to the chemical paste.
To apply a bandage correctly, you first spread a layer of paste over the hole. Then, you wrap the fiberglass bandage tightly around the pipe, overlapping the edges. Finally, you apply another layer of paste over the bandage. As the exhaust heats up, the entire assembly bakes into a hard, durable cast. This composite approach handles vibration much better than paste alone.
You can construct a durable, inspection-ready repair without a welder. Using heavy-duty split-sleeve exhaust joiners, exhaust paste, and zinc-coated U-bolt clamps creates a strong mechanical bond. This approach provides structural integrity that chemical patches lack. You cut out the damaged section of pipe with a hacksaw or exhaust pipe cutter, then slide the sleeve over the two clean ends.
Apply a liberal amount of exhaust paste to the inside of the sleeve before sliding it into place. This ensures a gas-tight seal. Tighten the U-bolt clamps down hard to crimp the sleeve onto the existing pipe. This mechanical repair often outlasts the rest of the exhaust system. It is a highly reliable method for straight sections of pipe that have rusted through.
Physical strain on the muffler destroys any patch. Loose flange connections, worn-out rubber exhaust hangers, and sagging pipes cause excessive movement. Re-securing these connections is vital to prevent the new patch from cracking due to vibration and stress. An exhaust system is designed to hang suspended, isolating engine vibrations from the chassis.
If a rubber hanger breaks, the weight of the exhaust pulls down on the pipes. This leverage snaps chemical patches and bends mechanical sleeves. Before applying any repair material, inspect every hanger from the engine to the rear bumper. Replace any stretched, cracked, or missing rubber isolators. Supporting the weight of the system properly is half the battle in ensuring your repair actually lasts.
Sometimes, cutting out a small section of pipe and welding in a replacement is the best option. A professional shop can quickly fabricate a patch panel or weld in a new section of tubing. Compare this against the time spent on DIY materials and the potential need for full replacement if the DIY fix fails. Welding provides a permanent, structural repair that restores the pipe to its original strength.
If you lack welding experience, do not attempt to weld thin, rusty exhaust pipes yourself. It requires skill to avoid blowing holes right through the degraded metal. A professional exhaust technician knows how to manage the heat and lay down a solid bead on older steel. If your DIY chemical patch fails repeatedly, it is time to take the vehicle to a shop for a welded repair.
Legal and regulatory evaluations matter. State inspection mechanics often view chemical patches with suspicion. Non-welded repairs risk failing emissions tests due to micro-leaks. A professional weld or an approved structural sleeve is usually required to pass strict inspections. Inspectors look for permanent repairs that guarantee no exhaust gases escape before the tailpipe.
If you live in a state with rigorous annual safety and emissions testing, a smear of gray paste on your muffler will likely result in a failed sticker. They require mechanical integrity. If you are patching the exhaust just to get through an inspection, use a heavy-duty sleeve and U-bolt clamps. This demonstrates a secure, mechanical repair that meets safety standards in most jurisdictions.
External patches cannot fix internal structural collapse. If you hear a rattling noise from the muffler, the internal baffles have likely failed. This restricts exhaust flow and damages engine performance, necessitating a full replacement regardless of external condition. The muffler contains a series of perforated tubes and chambers designed to cancel sound waves.
When these internal components rust and break loose, they block the exit path for the exhaust gases. This creates massive backpressure. High backpressure chokes the engine, causing a severe loss of power, poor fuel economy, and potential engine damage. No amount of exterior paste will fix a collapsed internal baffle. You must unbolt the old muffler and install a new unit.
There is a point of diminishing returns with patching. If the exhaust system requires multiple patches across different sections, the overall structural integrity is compromised. Thinning metal will continue to blow out, making replacement the only logical choice. You end up playing a never-ending game of whack-a-mole, fixing one leak only for another to appear a week later.
Tap along the length of the exhaust pipe with a wrench. A healthy pipe produces a sharp, metallic ring. A heavily rusted, thin pipe produces a dull, hollow thud. If the majority of your exhaust system sounds hollow, stop wasting time with patches. The metal is too far gone. Replacing the entire cat-back system is the most efficient and reliable solution at this stage.
Consider the long-term reliability of the vehicle. Spending hours underneath a car applying paste and bandages might seem economical initially. However, a professional muffler replacement guarantees safety, proper backpressure, and compliance. It provides peace of mind that the exhaust system will function correctly for years to come.
Factor in your own time and frustration. If you rely on the vehicle for daily commuting, a failed DIY patch on the highway is a major inconvenience. A new muffler restores the vehicle to factory noise levels and ensures dangerous gases are routed safely away from the cabin. Sometimes, replacing the part is simply the smartest mechanical decision.
The number one cause of sealer failure is poor surface prep. You must wire-brush, degrease, and sand the area down to bare metal before applying any sealer. Applying putty over rust or dirt guarantees the patch will blow off once the exhaust pressurizes. The chemical paste needs a clean, rough surface to bite into.
Scrub the area vigorously with a stiff wire brush to remove loose rust scales.
Use 80-grit sandpaper to scuff the surrounding metal, creating a textured surface for adhesion.
Wipe the area down with brake parts cleaner or acetone to remove all grease and oil.
Allow the solvent to evaporate completely before opening the sealer compound.
Apply the paste immediately to prevent flash rust from forming on the bare metal.
Improper curing ruins the chemical bond. Driving the vehicle too hard immediately after application prevents the sealer from setting correctly. Similarly, applying sealer in freezing temperatures halts the curing process. Follow the manufacturer's instructions for heat curing carefully. The transition from a soft paste to a hard ceramic requires controlled heat.
If you apply the paste and immediately jump on the highway, the rapid spike in exhaust temperature causes the moisture in the paste to boil. This creates steam pockets that fracture the patch from the inside out. You must let the vehicle idle. The slow, steady heat bakes the moisture out gently, resulting in a solid, crack-free seal. Patience during the curing phase is mandatory.
An improper seal carries significant life-safety risks. Patching holes located directly under the passenger cabin is dangerous if the seal fails. Always verify the repair with a post-cure leak test to ensure deadly carbon monoxide isn't entering the vehicle. Carbon monoxide is odorless, colorless, and lethal.
If you patch a leak near the floorboards, you must be absolutely certain the repair holds. After the paste has fully cured, repeat the shop vacuum and soapy water test. Check for any tiny bubbles around the edges of your patch. If you see any leakage, the repair is unsafe. Do not drive the vehicle until the leak is completely sealed or the pipe is replaced. If you have questions about safety, feel free to contact us for guidance on proper repair techniques.
Elevate your vehicle safely on jack stands and aggressively wire-brush the damaged area to confirm you have solid, bare metal for a repair.
Inspect all rubber exhaust hangers and metal flanges, replacing any broken components to eliminate stress on your new patch.
Apply a high-temperature chemical paste strictly following the manufacturer's idling and curing instructions to ensure a rock-solid bond.
Perform a post-repair leak test using soapy water to verify no carbon monoxide is escaping under the passenger cabin.
A: A high-quality sealer applied to properly prepped, bare metal can last several months to a year. It is considered a temporary to medium-term fix rather than a permanent solution, especially if the underlying metal continues to rust.
A: No, standard JB Weld cannot withstand the extreme temperatures of an exhaust system and will burn off. You must use a product specifically formulated for high heat, such as a dedicated exhaust putty.
A: While people use coins and high-temp epoxy as a makeshift backing plate, it is a temporary hack. Dissimilar metals expand at different rates under heat, which leads to premature failure of the patch.
A: It depends on the state and the inspector. Chemical patches often fail strict inspections. Approved mechanical sleeves or professional welds are usually required to guarantee compliance and pass emissions testing.
A: It is dangerous if the hole allows carbon monoxide to leak into the passenger cabin, especially under the seating area. Even small leaks must be addressed promptly to ensure driver and passenger safety.
A: Hook a shop vacuum to the tailpipe to blow air into the cold exhaust system. Spray soapy water on the suspected area. Escaping air will create bubbles, revealing the exact location of the pinhole.


