


Views: 0 Author: Site Editor Publish Time: 2026-08-04 Origin: Site


Exhaust leaks present immediate mechanical and safety hazards that go far beyond annoying noise. A compromised exhaust system leads to failed emissions inspections, degraded cabin air quality from carbon monoxide ingress, and a loss of backpressure that negatively impacts engine performance. Addressing these leaks promptly keeps the vehicle safe and operational.
While DIY enthusiasts and professional mechanics often turn to chemical sealants for exhaust repairs, premature failure remains a common frustration. This failure typically stems from a misunderstanding of the chemical properties, thermal limits, and structural limitations of different sealing compounds. Using the wrong product for a specific heat zone or failing to prepare the surface correctly guarantees a short-lived repair.
This technical evaluation of exhaust putty and muffler cement provides a framework to select, apply, and cure the correct exhaust sealing paste for specific zones of an exhaust system. Understanding these differences ensures a durable, gas-tight seal.
Thermal Thresholds Dictate Selection: Muffler cements generally withstand higher peak temperatures (up to 1500°F+) suitable for manifolds, while exhaust putties are optimized for mid-system joints and minor crack filling (up to 1000°F–1200°F).
Sealing vs. Structural Integrity: Neither compound replaces a mechanical weld or physical clamp; they are designed exclusively to contain exhaust gases, not to bear structural loads or connect unsupported pipes.
Vibration is the Enemy: Rigid cements are prone to cracking under high vibration if applied too thickly, whereas specific paste formulations offer marginal flexibility for slip joints and clamped connections.
Surface Preparation is Non-Negotiable: 90% of exhaust sealing paste failures result from applying the product over rust, carbon deposits, or grease rather than bare, abraded metal.
Longevity Expectation: Chemical repairs are inherently semi-permanent solutions. While they cure gas leaks immediately, thermal cycling and environmental exposure mean unsupported gap-fills will eventually degrade.
Muffler cement relies on sodium silicate-based formulations. Manufacturers engineer these compounds specifically to handle extreme heat environments. The chemical structure allows the cement to withstand the intense thermal loads found near the engine block and catalytic converter. You will typically find this product used on cast iron manifolds and heavy steel flanges where temperatures peak.
The curing process of muffler cement depends entirely on heat evaporation. As the exhaust system reaches operating temperature, the moisture within the cement evaporates. This leaves behind a rock-hard, ceramic-like finish. This rigid structure resists heat exceptionally well but lacks any flexibility. If the joint moves, the cement cracks.
The primary design intent of muffler cement focuses on high-heat resistance, rigid gap filling, and the permanent sealing of static joints. It excels in applications where parts bolt tightly together and movement remains minimal. Mechanics rely on it when mating warped flanges or sealing heavy-duty V-band connections where structural rigidity is already present.
To understand the application better, consider the physical state of the product. It usually comes in a tube or tub and has a gritty, thick consistency. You spread it with a putty knife or a gloved finger. Once it sets, you cannot easily remove it without a hammer and chisel or a grinder. This permanence makes it ideal for upstream exhaust components.
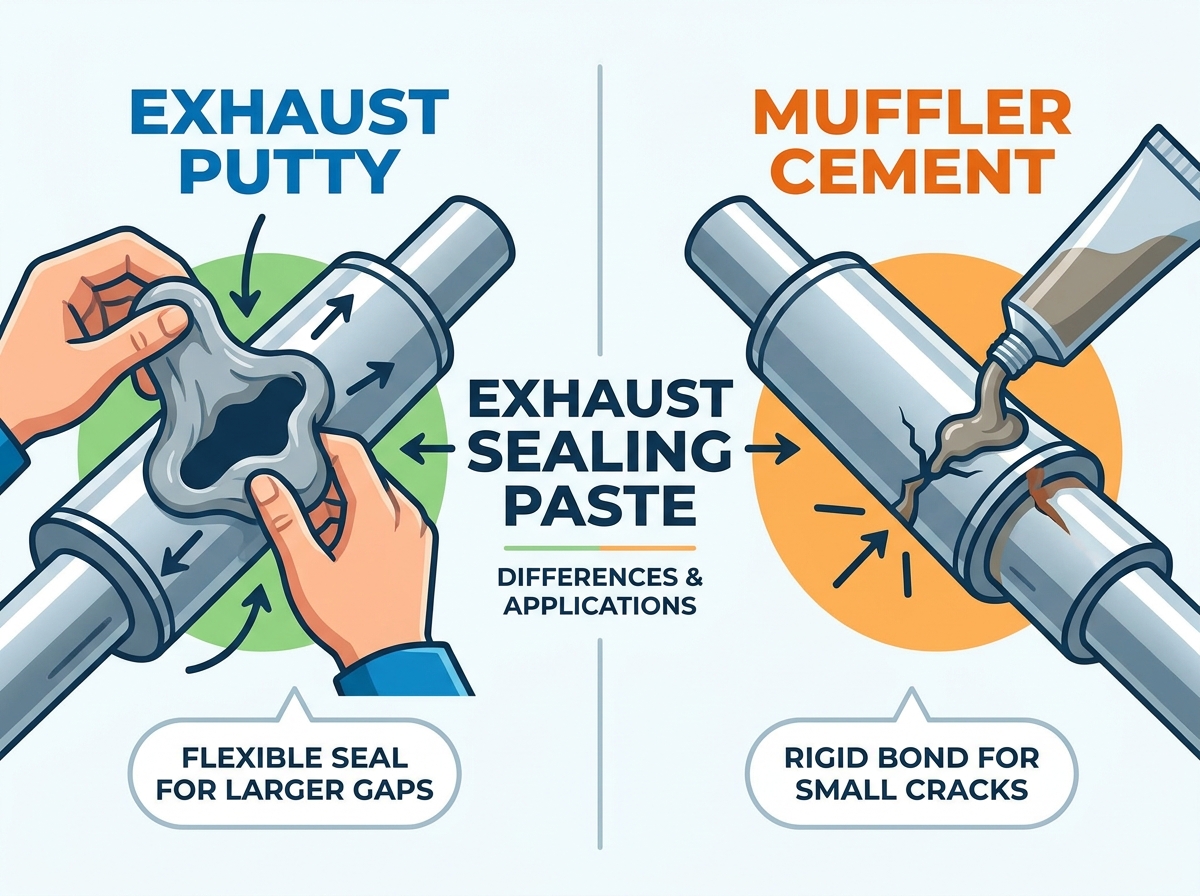
Exhaust putty features a completely different composition. It frequently utilizes clay-thickened synthetic resins or ceramic-metallic blends. This formulation provides a distinct set of physical properties compared to rigid sodium silicate cements. The goal here is workability and gap-bridging rather than absolute high-temperature rigidity.
The workability of exhaust putty stands out as a major advantage. It possesses a thicker, more dough-like consistency. This allows mechanics to mold the paste around complex shapes, press it into small punctures, or spread it evenly inside slip joints before assembly. It acts almost like a heavy body filler during the application phase.
The curing profile of exhaust putty contrasts sharply with muffler cement. It often requires a gradual heat cycle to cure properly. Applying intense heat too quickly causes the resins to bubble or blister, which compromises the integrity of the seal. A slow warm-up ensures a solid, uniform cure without creating porous weak points in the material.
Mechanics often prefer putty for downstream repairs. When dealing with mufflers, resonators, and tailpipes, the temperatures are lower, but the exposure to road debris and moisture is higher. The dense, moldable nature of putty allows for better surface coverage over irregular rust pitting or minor casing damage.
Temperature resistance forms the primary dividing line between these products. Standard exhaust putties generally handle continuous operating temperatures up to 1000°F–1200°F. In contrast, specialized muffler cements are rated for 1500°F or higher. This makes cement necessary for components closest to the combustion chamber.
Thermal expansion plays a massive role in sealant longevity. As the exhaust system rapidly heats and cools, the metal expands and contracts. A successful compound must tolerate these cycles without delaminating from the base metal. Rigid cements rely on a tight mechanical bond within a clamped joint, while some putties offer slight compliance before fully baking hard.
A significant real-world performance warning involves the "melt-away" phenomenon. Budget or unrated formulations often degrade rapidly. They melt or burn off well below their advertised temperature limits. Always select a high-quality compound rated for the specific heat zone of your repair. Applying a 1000°F putty to a 1400°F manifold guarantees immediate failure and a terrible burning smell.
Feature | Muffler Cement | Exhaust Putty |
|---|---|---|
Base Chemistry | Sodium Silicate | Synthetic Resin / Clay |
Max Temperature | 1500°F+ | 1000°F - 1200°F |
Flexibility | Zero (Rigid/Ceramic) | Marginal (Pre-cure) |
Ideal Location | Manifolds, Flanges | Slip Joints, Mufflers |
Cure Method | Rapid Heat Evaporation | Gradual Heat Cycle |
Muffler cement becomes inherently rigid once cured. This rigidity makes it highly susceptible to micro-cracking if subjected to significant movement. Applying thick layers of cement on flexible downpipes or unsupported mid-pipes usually results in the product fracturing. Road vibration simply shakes the brittle ceramic apart.
Exhaust putty offers slight elasticity prior to its full heat cure. This marginal flexibility allows it to accommodate minor joint shifts during clamp tightening and initial system alignment. Once fully cured, it too becomes relatively hard, though generally less brittle than pure sodium silicate cements. It handles the low-frequency vibrations of a tailpipe better than cement.
Understanding vibration zones helps dictate product choice. The engine block moves on its mounts, transferring vibration down the exhaust. The flex pipe absorbs most of this, but everything downstream still shakes over bumps. Rigid cement fails here unless trapped tightly between two clamped pieces of metal.
Muffler cement proves highly effective for sealing tight slip joints, flanges, and V-band clamps where tolerances remain minimal. Its thinner consistency allows it to penetrate micro-gaps. It creates a solid, gas-tight barrier between closely mated metal surfaces. You use it to perfect a joint, not to build a bridge.
Exhaust putty excels at bridging larger gaps. Its thicker build-up capability makes it suitable for filling pinholes or hairline cracks on muffler casings. When combined with a reinforcing mesh, putty spans physical voids that liquid cements would simply drip through. It acts as a structural filler when supported by a matrix.
The success criteria for slip joints involve preventing gas blow-by at clamped intersections without permanently fusing the joint together. A reliable seal ensures exhaust gases travel out the tailpipe rather than leaking under the vehicle cabin. Slip joints are notorious for tiny leaks even when clamped tightly.
Mechanics often apply a thin layer of exhaust sealing paste inside a sleeve or slip joint prior to inserting the pipe and tightening the clamp. This paste fills the microscopic imperfections in the metal. It guarantees a 100% gas-tight seal once the clamp provides the mechanical clamping force.
Clean the inside of the female pipe and the outside of the male pipe with a wire brush.
Wipe both surfaces down with brake parts cleaner to remove oil and grease.
Apply a 2mm bead of paste around the leading edge of the male pipe.
Slide the pipes together, twisting slightly to distribute the paste evenly.
Install and torque the exhaust clamp immediately before the paste skins over.
Wipe away any excess paste that squeezes out of the joint.
Distinguish between utilizing a paste as a mating-surface sealant versus a thread locker or clamp adhesive. A common DIY mistake involves slathering paste over the outside of a loose clamp, expecting it to hold the pipes together. The paste acts as a non-structural sealant, not an adhesive. It cannot hold the pipe together.
When patching small holes, the success criteria demand strong adhesion to flat or curved surfaces and the ability to resist blowout from internal exhaust pressure. The patch must remain intact despite thermal cycling and environmental exposure. A bare hole will blow out any paste pushed into it.
To repair physical holes, use exhaust putty in conjunction with a fiberglass mesh, metal patch, or exhaust bandage. The mesh provides a structural matrix, while the putty seals the gaps and adheres the matrix to the exhaust pipe. Applying putty over a hole without reinforcement results in an immediate blowout.
Wire wheel the area around the hole until you see bare, shiny metal.
Cut a piece of fiberglass mesh or aluminum patch slightly larger than the hole.
Apply a base layer of putty around the perimeter of the hole.
Press the mesh firmly into the base layer of putty.
Apply a top coat of putty over the mesh, feathering the edges into the surrounding metal.
Allow the patch to air dry for at least two hours before starting the engine.
The success criteria for manifold repairs require surviving extreme Exhaust Gas Temperatures (EGTs) directly adjacent to the engine block. This represents the hottest section of the exhaust system, demanding specialized compounds. Temperatures here easily exceed 1200°F under load.
High-temp muffler cement or a dedicated copper-based high-temp sealant is required for manifold flanges. Standard exhaust putty will quickly burn off, melt, or turn to ash in this environment. The compound must carry a rating for at least 1500°F to survive the thermal shock of a cold start followed by heavy acceleration.
A common gasket integration strategy involves using a thin bead of high-temp cement to assist traditional flange or rope-style gaskets. This ensures a micro-gap seal against pitted manifold surfaces without displacing the physical gasket itself. You apply a paper-thin smear to the metal face, press the gasket on, and bolt it down.
A dangerous misconception exists that chemical sealants can fix snapped pipes, broken hangers, or blown-out flex pipes. These compounds possess zero tensile strength. They cannot hold two pieces of metal together under stress. If you hit a bump, the joint will snap.
The fundamental rule of chemical exhaust repair states: If the joint cannot support its own weight mechanically, a chemical paste will fail immediately. Clamps, welds, and hangers provide the structure; the paste only provides the gas seal. Never rely on putty to keep your muffler from dragging on the highway.
Users frequently complain that regular muffler cement doesn't hold after a while. This failure rarely points to a chemical defect but rather an application error. Thick blobs of cement applied over a gap without mechanical support are doomed to fail. The material simply lacks the structural integrity to span a void.
The mechanical degradation cycle explains this failure. Road vibrations and continuous expansion/contraction cycles cause brittle, unsupported plugs of cement to fracture. Once a micro-crack forms, exhaust pressure quickly blows the chunk of cement out of the joint. You must trap the cement between two pieces of metal for it to survive.
Surface preparation remains the most critical step in any exhaust repair. The exact prep requirements include wire wheeling the area to bare metal, thoroughly degreasing the surface, and removing all loose rust scale and carbon deposits. Skipping this step guarantees failure.
A chemical reason dictates this rigorous prep. Sodium silicate cements and synthetic putties will not bond to iron oxide (rust) or oily residue. Applying paste over a dirty surface guarantees that the sealant will flake off as soon as it cures. The paste bonds to the rust, and the rust flakes off the pipe, taking the patch with it.
Improper curing ruins many repairs. Idling the engine too long immediately after application causes the moisture in the paste to boil. This leaves a porous, weak structure full of tiny air pockets. Conversely, driving the vehicle immediately under heavy load blows the wet paste out of the joint before it sets.
The industry-standard heat-cycling methodology involves allowing the paste to air dry for several hours (or overnight) until it skins over. Then, idle the engine for 10-15 minutes to gently bake the compound. Follow this with a cool-down period before normal driving. This slow bake drives out moisture without boiling the resins.
Evaluate how fast the product skins over. Fast-curing cements require rapid assembly of clamps and pipes, making them challenging for complex alignments. If you take too long, the cement hardens before you tighten the bolts, ruining the seal. Putties generally allow more time for adjustment and shaping before they begin to set.
Assess the cured product's resistance to environmental factors. The undercarriage faces constant exposure to road salt, moisture, and debris. A high-quality compound must resist degradation from these elements to maintain a lasting seal. Look for products that specify resistance to automotive fluids and winter road treatments.
Consider the permanence of the repair. Joints sealed with rigid muffler cement often require heat and significant physical impact to break apart later. You usually have to cut the pipe or beat the joint with a hammer. Joints sealed with a softer paste or copper-based sealant are generally easier to disassemble for future maintenance.
Assess the physical damage to your exhaust system to determine if you need rigid cement for a high-heat flange or moldable putty for a mid-pipe slip joint.
Purchase the appropriate compound, ensuring the temperature rating matches the specific zone of the exhaust system you are repairing.
Gather abrasive tools, such as a wire brush or angle grinder, to ensure perfect surface preparation down to bare metal.
Acquire the necessary mechanical clamps, sleeves, or fiberglass mesh to provide structural support for the chemical sealant.
Follow the manufacturer's specific heat-cycling instructions to cure the paste slowly, avoiding boiling or blowout. For further assistance, contact us.
A: Standard epoxy-based JB Weld degrades at exhaust temperatures. Only extreme-heat formulations or dedicated silicate exhaust cements should be used. Mechanics referring to "JB Weld" for exhausts are usually talking about specialized high-temp metal-filled pastes, not standard epoxy.
A: Typical timeframes involve 2-4 hours of ambient drying followed by a 10-15 minute idle period to heat-cure the compound. Always follow the specific manufacturer's instructions.
A: If the cement successfully stops the leak and there are no structural safety issues, it will generally pass. However, heavily patched systems may fail visual inspections in strict jurisdictions.
A: Standard putty fails here due to extreme heat and thermal expansion. You must use specialized high-temp cast iron cement or opt for professional welding.
A: Without physical containment like a sleeve, bandage, or clamp, thick blocks of cement lack the tensile strength to survive thermal expansion and road vibrations.
A: Mesh is required when bridging physical gaps or holes to provide a structural matrix for the paste. It is unnecessary for sealing tight slip joints.
A: No. Exhaust paste is designed to seal mating surfaces against gas leaks. It does not possess the adhesive properties required to lock threads or hold structural components together.


